

How To Connect Cameras To Gen Iv
If you are wondering if you can use a Canon 5D Mark 4 equally a USB webcam, the answer is yep! You lot'll just need a few pieces of hardware in order to get there. This mail service shows you how information technology all works!
UPDATE: Canon recently released the complimentary EOS Webcam Utility, which makes this entire procedure easier (and cheaper). I wrote a post on how to employ information technology with the 5D Mark Iv hither.
I also recently put together an article on how to stream to Facebook Alive and YouTube simultaneously, for free, in case that's something you are interested in. If not, read on!
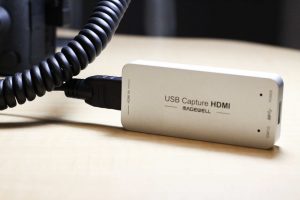
Starting time things first, you'll need a style to use a HDMI signal as a USB webcam. The product that I apply is the Magewell USB Capture HDMI Gen 2, shown beneath:
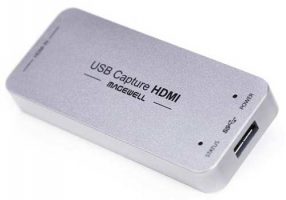
Magewell USB Capture HDMI Gen ii
The product is literally equally plug and play equally anything I've ever worked with. The only limitation with this particular device is input/output resolution, which but goes every bit high as 1080p 60fps (more than on that in a bit). Information technology'due south also somewhat expensive at $299, and then for a less expensive alternative you can take a look at either the MYPIN HDMI Game Capture Card ($79.99) or the Elgato Cam Link 4k ($129).
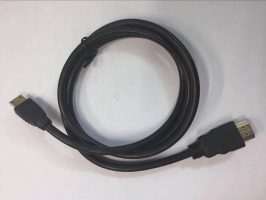
The 5D Mark Four does non come with an HDMI cable, so you'll need to buy one. This one will work – even with the cablevision protector (more on the cable protector below).
Setting up the Camera
Plough the camera on and put it in video style using the switch on the back of the photographic camera, as shown below:
5D Mark IV Video Mode Switch
Once in flick mode, you can choose to use any of the shooting modes at your disposal on the acme of the photographic camera (M, Av, Television receiver, P, or total auto). I'd recommend that you lot get your settings dialed in to your liking before you start streaming.
Next, set the HDMI frame rate by striking the "Card" button on the back of the camera, then go to page iv of the Setup menu (the little wrench icon). The HDMI frame rate setting is the starting time ane listed. The Catechism 5D Mark IV doesn't output at 60 frames per second, but it does output 59.94 fps, which is fine.
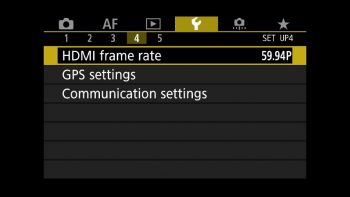
Canon 5D Marking IV HDMI Output Settings
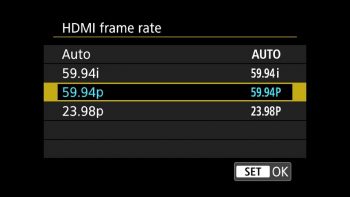
Catechism 5D Mark Four with 59.94 FPS selected
Focus Mode on the Camera
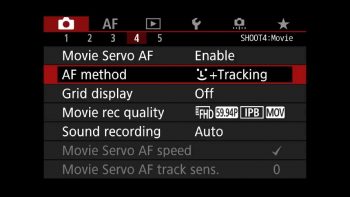
The Canon 5D Mark 4 has a "face up tracking" focus mode that's perfect for a webcam setting. In lodge to enable face tracking, become to page four of the "shoot" menu and utilise the center push on the back of the camera to select "AF method." Select face up tracking, every bit shown below:
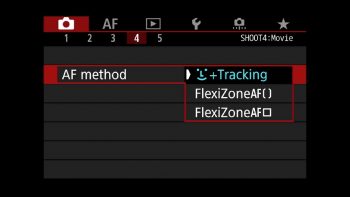
One time selected, your carte du jour should wait like the image beneath:
Adjusting Further Photographic camera Settings
You might encounter a bunch of menu items from the camera itself in the preview window of your software, and you'll definitely want to get rid of those! You lot can hands remove them by pressing the "INFO" button on the dorsum of the photographic camera.
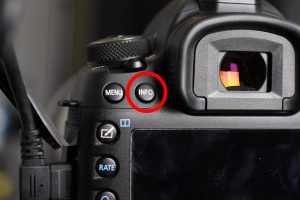
Info button on the dorsum of the Catechism 5D Marking IV
Keep pressing the Info push button until you go a clean indicate from the camera that'southward non showing a bunch of carte du jour items. The capture software you lot are using will record whatsoever information technology sees coming out of the HDMI port from the camera. It's literally "what you run across is what yous get."
If you don't want those menu items to ever show up, there's a setting on the camera that allows you to modify that. On folio 5 of the "shoot" menu on the 5D Mark IV (the menu with the lilliputian camera icon), there'due south a setting for "HDMI display." Press that and you lot'll come across that you tin can choose to have the camera output a signal without any info showing.
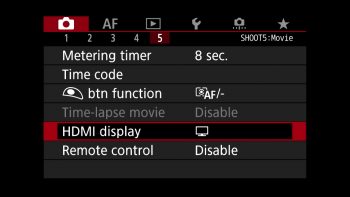
HDMI display setting
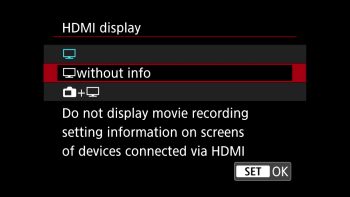
Output the HDMI signal without any info screens showing
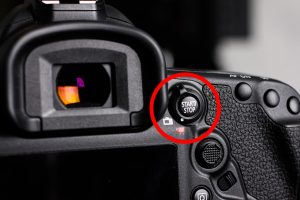
VERY Of import: At that place'due south an HDMI brandish setting on the photographic camera that allows you lot to utilize the LCD on the camera equally well equally view the output from the HDMI port (simultaneously), with the added benefit beingness that the only matter seen by the connected device is the video from the camera (no menus). Sounds perfect, but if yous plan on using the camera for more than than 35 minutes, Do Not USE THIS SETTING! For some reason, if the camera's LCD remains on and there's no interaction between you and the camera, the camera will shut its screen off after 35 minutes and give you a message that says "Press Start/Stop push to activate movie shooting." Worse nonetheless, streaming volition stop in OBS. I found this out the hard way, so trust me – never apply this setting! The setting to avoid is shown below (highlighted with the red square).
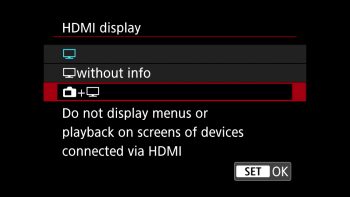
DO Non USE THIS SETTING!
Disable Auto power off!
At that place's one terminal setting you need to be aware of, and it'southward a big one. Disable the "Machine power off" feature on the photographic camera! Otherwise the camera will literally just shut itself off while you are recording or streaming. To disable the auto power off setting, hit the "Carte du jour" button on the back of the photographic camera, and so become to page 2 of the Setup carte (the petty wrench icon). You'll detect the "Automobile ability off" as the first setting listed. Be sure to prepare it to "Disable."
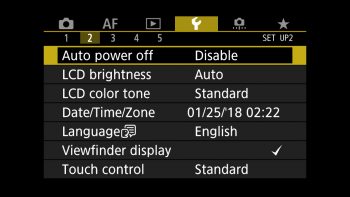
Auto Ability Off settings
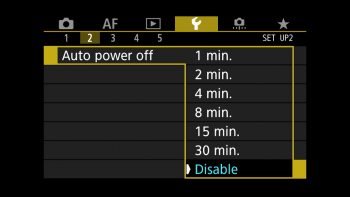
Disable the Motorcar power off settings!
Connect the Hardware
Your 5D Mark Four came with a cablevision protector (information technology'south a weird looking plastic affair). The purpose of the protector is to prevent damage to the HDMI input, which apparently costs a LOT of money to repair. Hither'due south what the cable protector looks like with the HDMI cable routed through information technology:
Attach the cable protector to the camera, as shown below:
Next, go ahead and plug your HDMI cable in, as shown beneath:
HDMI cable plugged into the photographic camera with Canon cablevision protector
Attach the HDMI cablevision from the camera to the capture device
HDMI cable plugged into capture device
Plug the USB Cable from the Capture Device into the Computer
Doesn't become much more simple than this. Just plug the USB cablevision from the capture device into your calculator and the device automatically activates (the Magewell is pictured below). Windows 10 will recognize the device as "USB Capture HDMI" – substantially a HDMI to USB webcam.
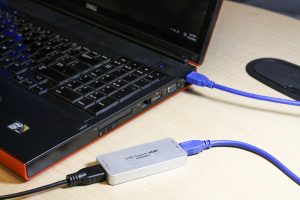
USB cable plugged into estimator from capture device.
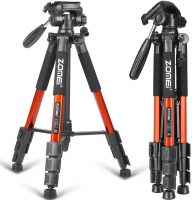
Mountain the Photographic camera to a Tripod
You'll want to mount the camera to a tripod that'southward capable of holding the weight of the photographic camera/lens. In that location are a number of tripods bachelor, but if yous are looking for an inexpensive solution you can selection up the ZOMEI 58" Compact Light Weight tripod for around $50 from Amazon.
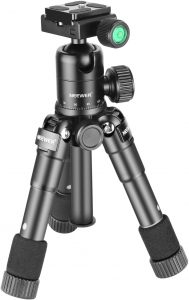
If you are looking for a tripod that will mount on your desk (and holds the weight of the 5D Mark 4), you tin can pick up the Neewer 20 inch desktop tripod from Amazon for $50.
Configuring Software
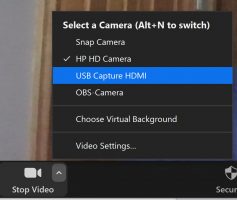
You'll demand to configure your software (such as the free OBS) to use your camera every bit a USB webcam. Settings will vary depending on the software you are using, only in full general in that location should be a fashion to easily tell the software which device to utilise as a camera. If you are using the HDMI to USB adapter that I recommend in this article, the camera volition show up in your devices every bit "USB Capture HDMI."
Hither's what you'll see in Zoom:
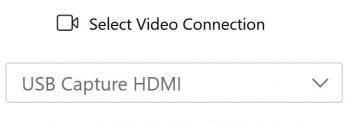
Here's WebEx:
Here's how to configure OBS on Windows ten:
In the "Sources" window, click the plus icon to add a source and cull "Video Capture Device" every bit shown below:
Choose "Create new" and type in a name, as shown below:
If yous don't see a preview from your camera, double-click on the source you only created to open the settings and make sure that "USB Capture HDMI" is chosen, equally shown beneath:
Once that's configured, the software should give you a preview of what the camera sees.
Audio Options
The 5D Mark Iv as well as the Magewell USB Capture HDMI Gen ii device tin output sound over HDMI, which makes setting upwards the audio that much easier. It's up to y'all whether or not you lot want to plug in an external mic or use the camera's built-in microphone, simply either style yous should be able to configure your capture software to use the "HDMI (USB Capture HDMI)" as the sound source. Here'southward how to set up it upward in OBS on Windows 10:
Go to the "File" carte and choose "Settings" as shown below:
Click on "Audio" and for the "Mic/Auxiliary Audio Device" select "HDMI (USB Capture HDMI)" every bit shown below:
Select "HDMI (USB Capture HDMI)" from this carte du jour.
You lot'll come across your audio levels active in the "Mic/Aux" section of the mixer in OBS as shown below:

Battery Life
Suppose you want to use your camera for a live stream that volition run for hours? Sadly, the standard bombardment won't concluding very long without a scrap of help. Fortunately, at that place is a solution.
The setup that I put together utilizes these four pieces of equipment (around $187 total):
- EasyAcc Monster 20000mAh Ability Bank ($32.99) – this is your "battery"
- Tether Tools Instance Relay Camera Power Arrangement ($99.99)
- Tether Tools Relay Camera Coupler ($34.99)
- Tether Tools StrapMoore ($18.95)
Here's how it works:
If you lot are using a tripod, the first thing to do is attach the Tether Tools StrapMoore to a leg on your tripod, as shown below:
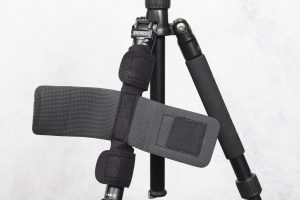
Next, grab the ability bank and the Case Relay Camera Ability System. For my setup, I stacked the Ability System on top of the power bank (in the eye), then holding both together, wrapped the TetherTool's StrapMoore's strap around them. The ability banking company and Power System are held in place both by the StrapMoore's strap likewise as the heavy-duty GripperElastic that the StrapMoore is lined with on the within. The StrapMoore can hold up to two pounds without a problem.
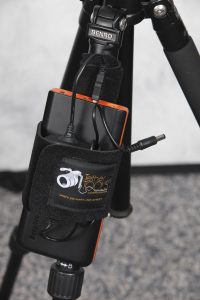
In one case attached, you lot'll have both the power banking concern and the Example Relay Power System fitted snugly to your tripod leg via the StrapMoore. Go ahead and plug the USB cable from the Example Relay Camera Ability System into any of the available USB ports on the power bank. In one case that's done, your setup should await similar to what's shown below:
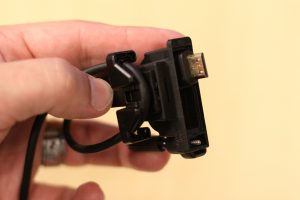
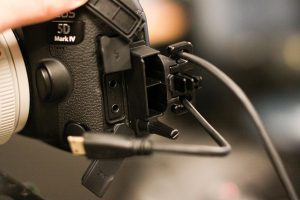
The merely thing left to practise now is attach the Tether Tools Relay Photographic camera Coupler and plug it into your camera where your original battery was. Go along in mind that in order for this to work on the Canon 5D Mark IV, you'll need to use the little hidden "trap door" and run the cable from the Camera Coupler through it. The photographic camera will literally not plow on unless the battery door is airtight nice and tight, so this is a vital step! Shown below are some shots of how the subconscious door works along with both ends of the Photographic camera Coupler plugged in:
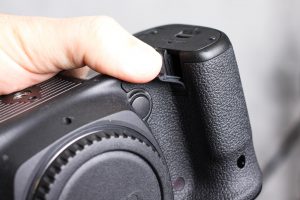
Hidden "trap door" on the torso of the Canon 5D Mark IV
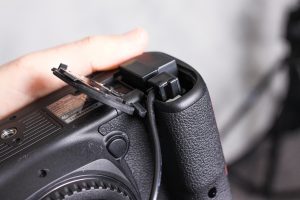
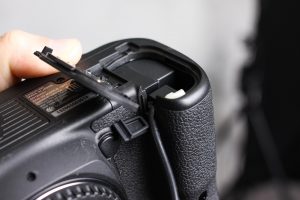
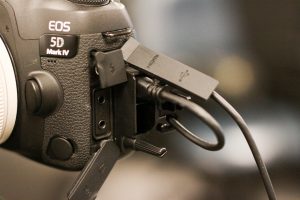
Camera Coupler fully seated in the camera'southward battery housing.

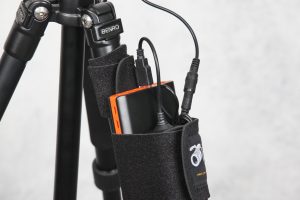
The StrapMoore and the Case Relay Power System working together!
Once the Camera Coupler is attached, you can plough your camera on and relish hours of hot-swappable bombardment life!
If you need a continuous ability source for a long video shoot, that can be done likewise. I used a Samsung ability adapter and plugged the USB cablevision from the Example Relay power system into information technology (shown beneath). If you don't accept a power adapter handy, this ane will do the job.
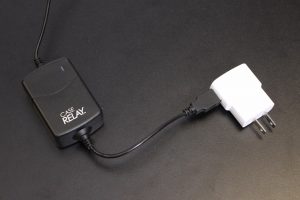
Case Relay Power System plugged into a ability adapter
I plugged the Samsung adapter into an extension string and I was all prepare! Continuous power for equally long as I needed it.
That's information technology! Let me know if you have whatsoever questions in the comments below!
Source: https://timfordphoto.com/using-a-canon-5d-mark-iv-as-a-usb-webcam/
Posted by: gallawaysagell.blogspot.com
0 Response to "How To Connect Cameras To Gen Iv"
Post a Comment